
Using the Essential Import Utility
22 min
The Essential Cloud Import Utility is easy to use. Below you will find key concepts and an instruction guide on how to use the Essential Cloud Import Utility
Key Terms
Capture Spreadsheet – The spreadsheet that allows the capture of bulk data
Import Spec – Specifies which classes and slots to send the data in the spreadsheet to
Reference Repository(Cloud Only) – defined in import settings, supplies the classes and slots available to the import utility
Target Repository (Open Source Only) – defined in import settings, supplies the classes and slots available to the import utility
Data Sources – Defines the source of data for an import, usually an excel spreadsheet
DUP – Data Update Pack – contains the data from the Capture Spreadsheet in a form that can be applied to Essential
Completing the Capture Spreadsheet
The pre-defined capture spreadsheet has three types of the worksheet:
Definition Worksheets – Where you define lists of instances to be imported
Mapping Worksheets – Where you map-related instances together
Reference Worksheets – Worksheets containing Essential Reference information such as Lifecycles or Deployment Status
Definition Worksheets
In definition worksheets column B is always headed ID. This creates a unique ID for the instance in Essential and should not be altered.
Definition worksheets will contain at least 2 other columns for data to be added, name and description, these will be free format fields for you to type the information. They may also contain other data add columns, which may be free format or may be validated columns. Validated columns link to other worksheets and contain either the names of instances captured in definition worksheets, or reference data. It is very important that you use the drop down list provided to complete the validated columns to avoid errors, such as a misspelling, which will create a duplicate and impact the relationships that are built.
Mapping Worksheets
Mapping worksheets contain two or more columns that allow you to create relationships between instances that you have captured in definition worksheets, for example, mapping applications to application services. The have no ID column and should not be used to create new instances. It is very important that you use the drop down list provided to complete the validated columns to avoid errors, such as a misspelling, which will create a duplicate and impact the relationships that are built.
Reference Worksheets
Reference worksheets are pre-populated and used to populate certain of the validated columns. They should not be altered as the data is not re-imported in the import spec and so any changes or additions will be lost and will cause errors in the imported data.
Import Utility for Essential Cloud & Essential Docker
Setting Up the Import Utility
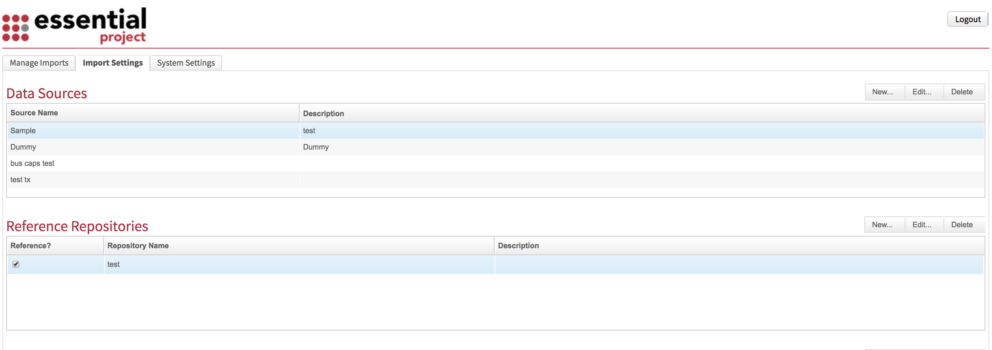
First you need to set up the Import Utility. From the homepage click on the Import Settings tab

Step 1
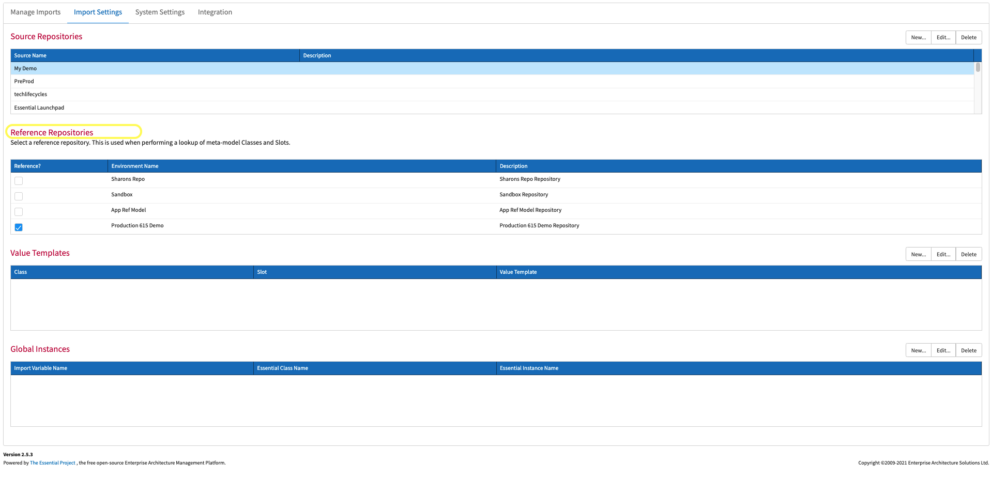
Reference Repositories
FOR Cloud and Docker
To define a new import setting, set the Reference Repository ( Production, Pre Production or Sandbox) in which the import will be based on in terms of classes and slots defined by ticking the relevent checkbox . Click New.
Step 2
Data Sources
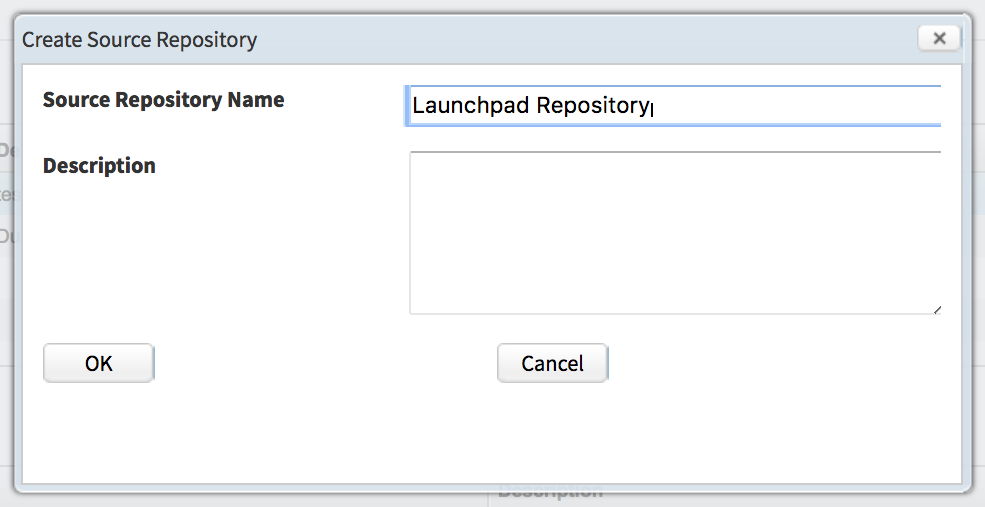
To define a data source click New. In the ‘Create Source Repository’ window, add the name of the data source, usually a spreadsheet. Click OK.
Step 3
Go back to the homepage and select the Manage Imports tab.

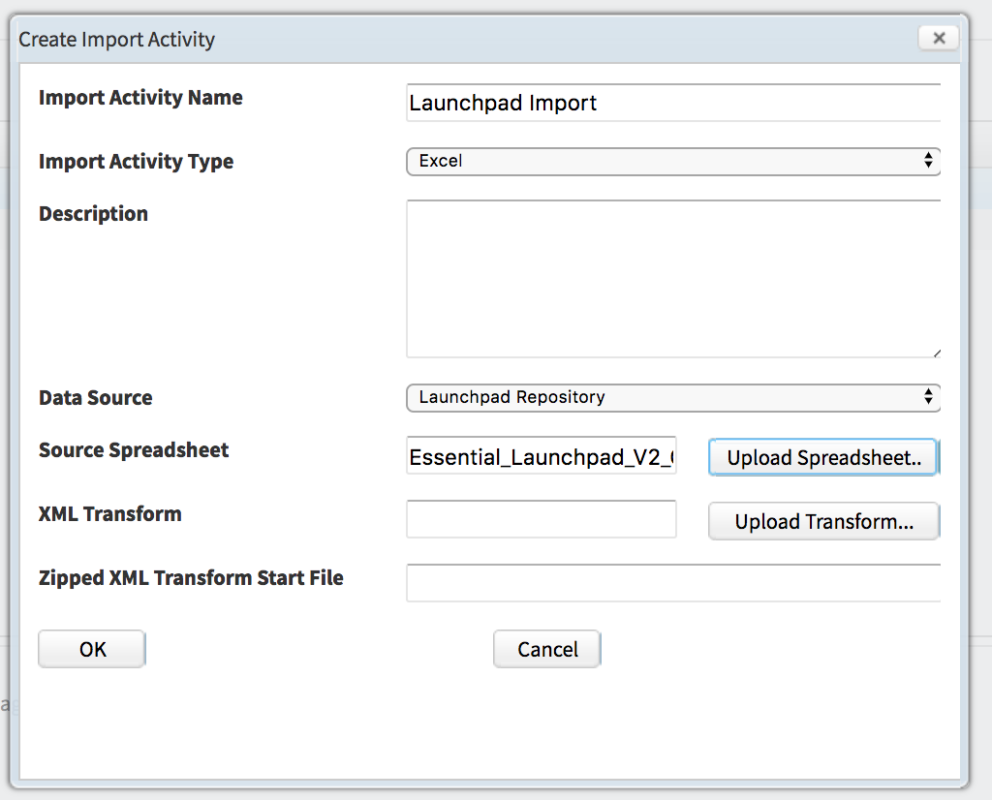
To set up a new Import Activity Click New and the ‘Create Import Activity’ window will appear.

- Name the activity
- Select Excel as your import type
- Choose the Data Source you set up in Step 2
- Click Upload and navigate to and select the spreadsheet to be imported, e.g. the Launchpad spreadsheet
- Ignore the other fields and click OK
Step 4
Select the Import Activity and click Open

Step 5
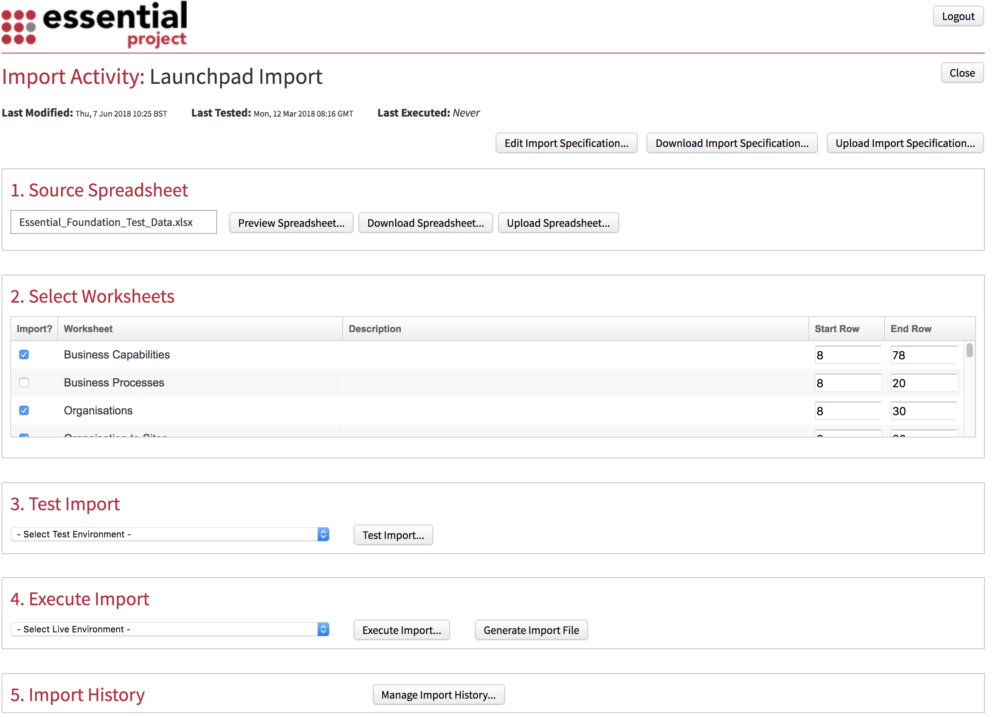
You will see the Import Activity Screen
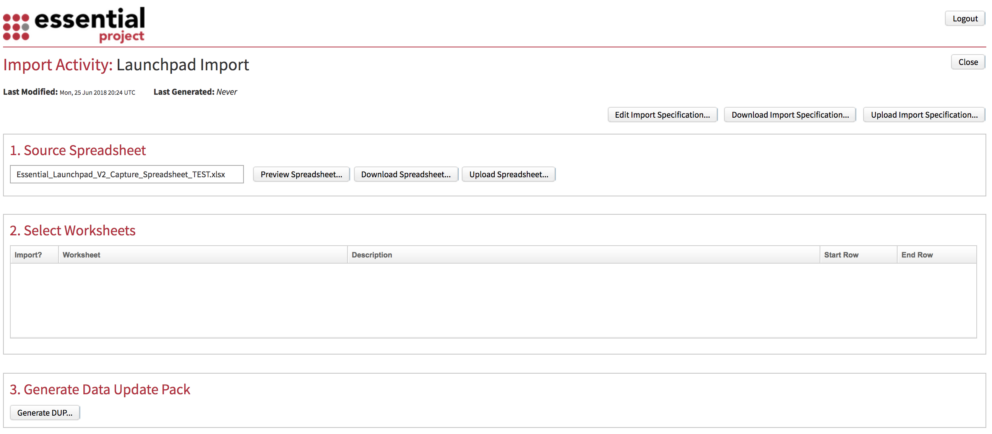
Use the Upload Import Specification button to upload the Import Spec for this activity. It will be an XML file; note it must be zipped.
Creating your own import specifications is not part of this how to guide.
- Source Spreadsheet
This will contain the spreadsheet you uploaded in step 3.4. Note: You can upload later versions of the spreadsheet using the Upload Spreadsheet button
- Select Worksheets
To ensure that you bring in only the data you want, you can tick and untick worksheets and amend the start and end rows.
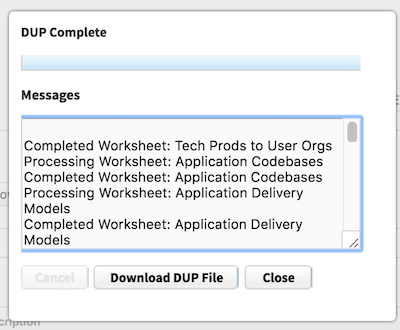
- Generate Data Update Pack
Click the Generate DUP button. When it is complete you will see the screen below.
Click the Download DUP File button and save the DUP somewhere.
Step 6
- Go back into the Essential Platform and ensure you are in the repository you want to apply the data to
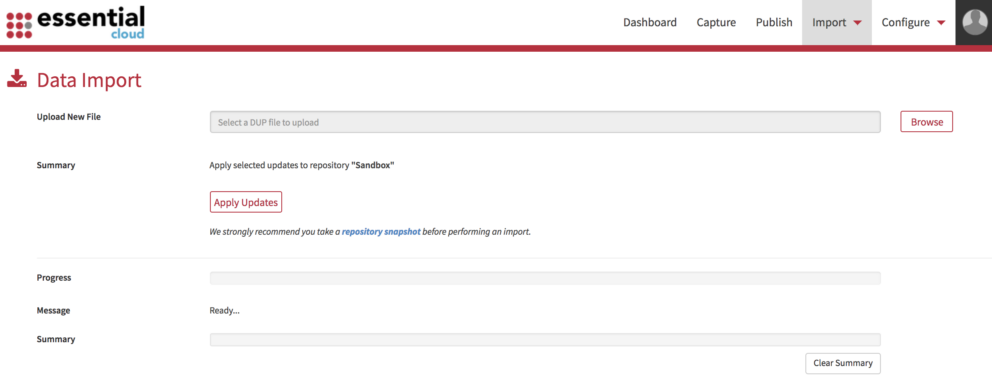
- Now select Import then select Data Import from the menu, you will see the Data Import screen
- Click the Browse button and select the DUP you generated and saved.
- The Summary line will show you which repository is selected
- Click the Apply Updates button to add the data to your repository
Import Utility for Essential Open Source
Setting Up the Import Utility
First you need to set up the Import Utility. From the homepage click on the Import Settings tab

You will now see the screen shown below

Step 1
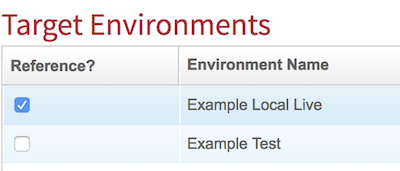
Target Environments
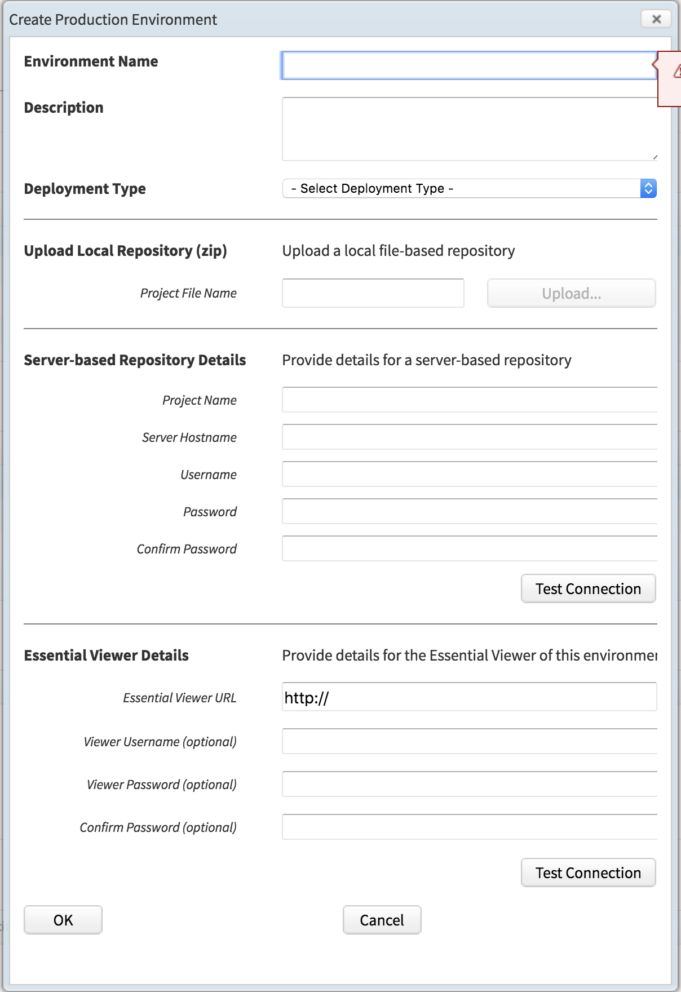
You need to define a target repository, ie. a baseline to use, this is defined as a Target Environment. Click New Live to see the ‘Create Production Environment screen’.
- Create an environment name, usually the repository name
- Select a deployment type, either Local or Server depending on your install
- Use the Upload button to navigate to and upload a zipped version of the repository
Note: The target repository should be your latest production repository, unless you are going to use the DUP option. You will need to either update it here or in Step 6 or 7.
OR, If you are server based enter your server details
- Enter the path to your viewer if you’d like to test or publish the repository directly
This should be a test viewer as you should not test imports in the production viewer
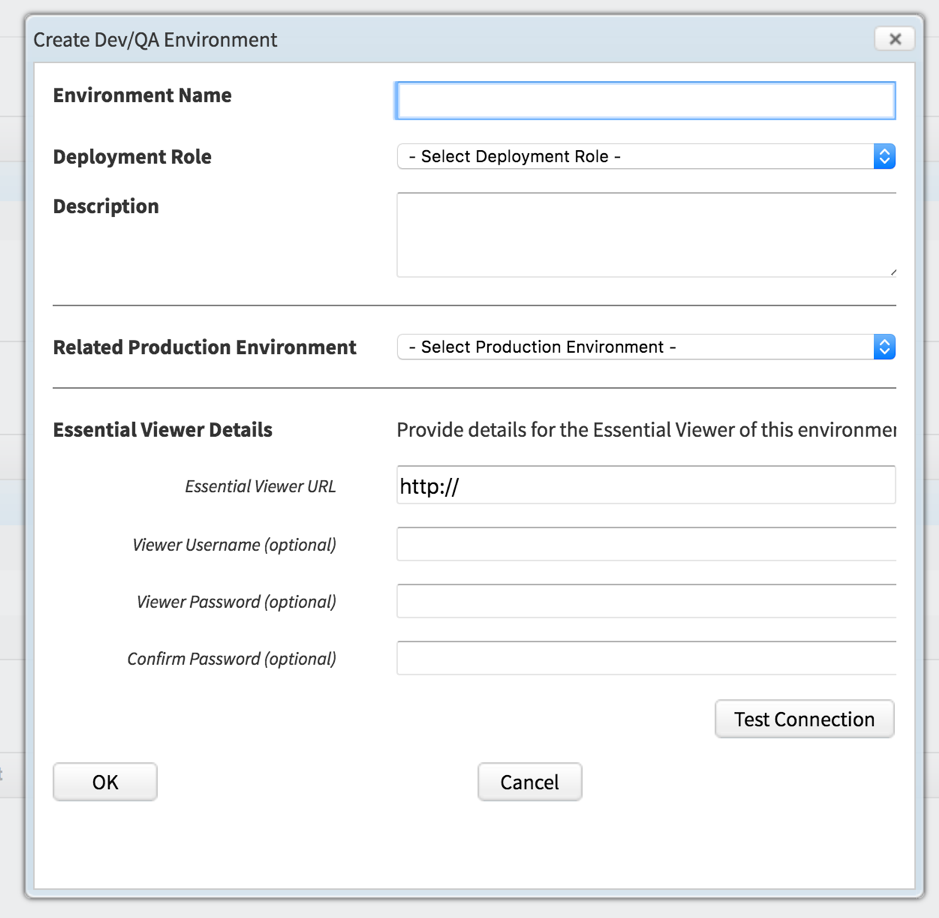
You will now be back on the Import Settings page, in the Target Environments section Click the New Dev/QA button to set up a test environment.
- Create an environment name, usually the same as the production environment name but with Test or QA after
- Select a Deployment Role, either Dev or QA
- Selected the related Production Environment, this will be the one you created in the previous step
Step 2
Data Sources
To define a data source click New.In the ‘Create Source Repository’ window, add the name of the data source, usually a spreadsheet. Click OK.

Step 3
Go back to the homepage and select the Manage Imports tab.

To set up a new Import Activity Click New and the ‘Create Import Activity’ window will appear
- Name the activity
- Select Excel as your import type
- Choose the Data Source you set up in Step 2
- Click Upload and navigate to and select the spreadsheet to be imported, e.g. the Launchpad spreadsheet
- Ignore the other fields and click OK
Step 4
Select the Import Activity and click Open

Step 5
You will see the Import Activity Screen
Use the Upload Import Specification button to upload the Import Spec for this activity. It will be an XML file
You can edit import specifications with the Edit Import Specification button. If you are using specification provided by the Essential team then there is no need to edit/amend these for the imports to work. Creating your own import specifications is not part of this how to guide.
- Source Spreadsheet
This will contain the spreadsheet you uploaded in step 3.4. Note: You can upload later versions of the spreadsheet using the Upload Spreadsheet button
- Select Worksheets
To ensure that you bring in only the data you want you can tick and untick worksheets and amend the start and end rows.
The import matches on ID and then Name, so if you want to add additional information, such as lifecycle, to applications you have already imported you can simply add the data and re-import as it will match to the existing applications in the repository. You can also use this to update data, for example, if you want to change an application name you can do so and then re-import – it will match on the ID and then update the name (although this would be easier to do in the repository itself!).
- Test Import
Select the Test Environment from the dropdown, this will be the Dev/QA repository that you created earlier
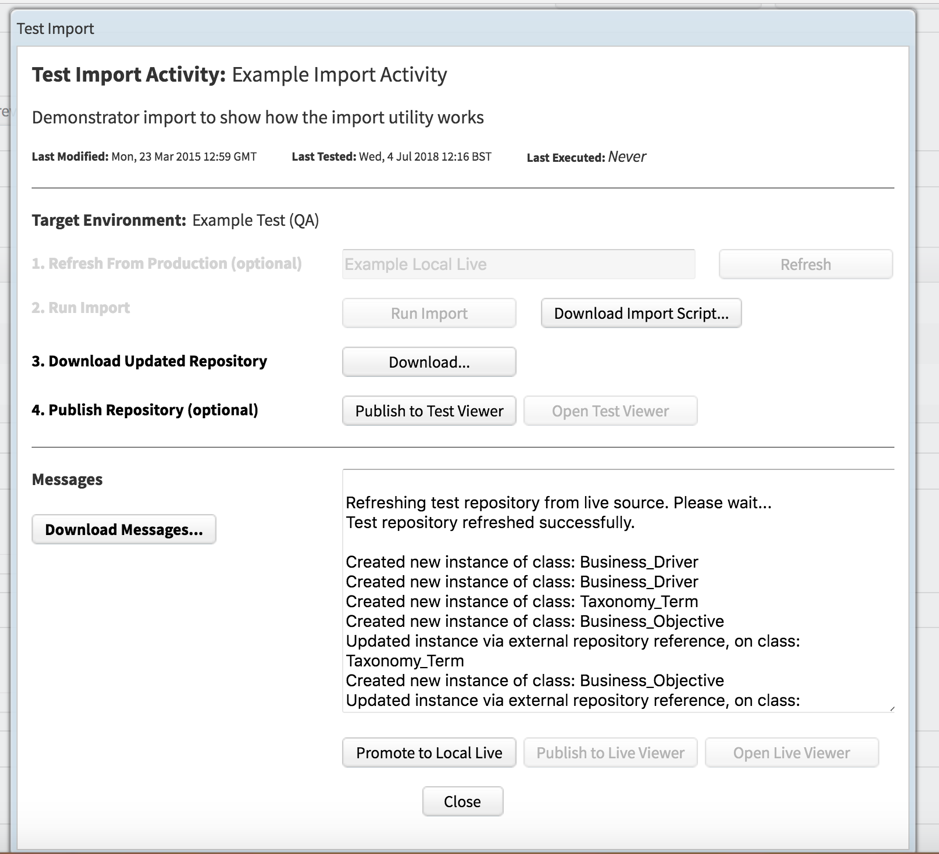
Click Test Import and you will see the ‘Test Import’ Screen
Step 6
- If you have changed the target repository click Refresh to update the target repository.
- Click Run Import – you will see the import working through the sheets. Depending on the amount of data this may take some time
- Click Download Messages and search for ‘warning’ and ‘exceptions’ to ensure there are no errors in the data
- If OK click Download to download a copy of the repository with the new data. You can then open the repository to check the data and publish, if required.
- You can optionally click Publish to Test Viewer to directly publish to the viewer you added in Step 1 to test the data.
- You can optionally click Promote to Local Live to overwrite the target repository that you added in step 1
- If you are using a local version of Essential Open Source once you are happy with the result you can promote this repository to your production environment.
Step 7
If you are using a server based version of Essential Open Source you need to complete this step. If you are using a local version you do not have to complete this step if you have completed steps 5 and 6 in Step 6.Once you have tested your import in Step 6 above and are happy with the result you can either Execute your import. You have two options:
- Click the Execute Import button.

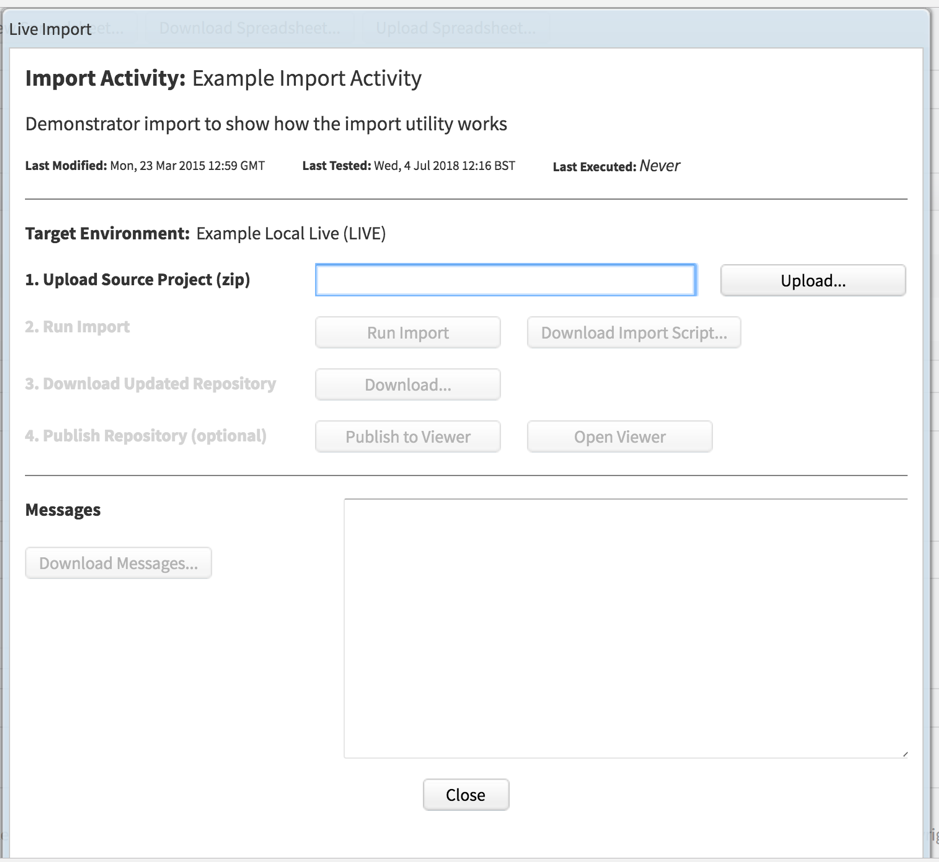
You will see the ‘Live Import’ screen.
- Upload the repository you want to add the data to
- Click Run Import
– If you set up a server based repository in step 1 it will apply the changes directly to the repository
– If you added a local repository it will apply the changes and update the target repository – much like clicking Promote to Local Live in the Test section
- Click Publish to Viewer to publish to the viewer you added in Step 2
Alternatively,
- Click the Generate Import File button. This will download a DUP to your downloads file, you should save the DUP somewhere sensible.

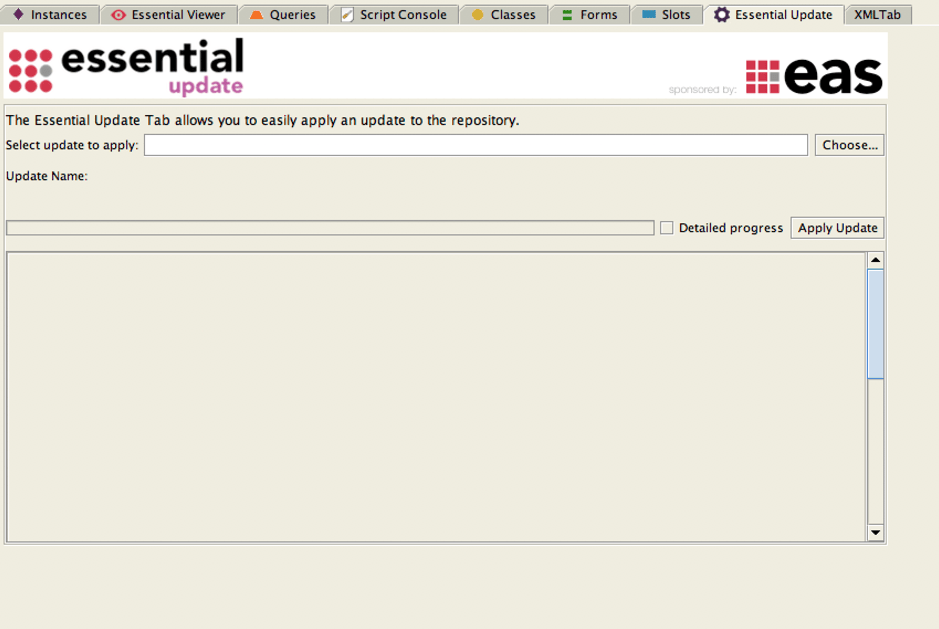
- Open your production repository and select the Essential Update tab
- Click Choose and navigate to the DUP and select it
- Check the Detailed progress box and click Apply Updates button to add the data to your repository
- Save the repository with a new name, maybe as the next version.
- Publish to the viewer
Updated 31 October 2023